
The back country around Arthur's Pass is less visited than the more popular routes down south – like the famous Milford, Routeburn and Kepler tracks found in Fiordland. I have
walked the Routeburn in the winter almost 30 years ago with my brother James
and it was an amazing experience. However,
the major tracks are highly managed to suit a wider range of visitors and for
my first hike (or ‘tramp’ as the kiwis call it) in NZ since that time, I wanted
to go somewhere a little more challenging and remote.
In researching the area leading up to the trip I found a
route called “The 3 Passes”. Starting 10
km south of the Arthur's Pass Village. The standard route takes you via the Harman,
Whitehorn and Browning Passes, finishing on the West Coast. As I would be doing the trip solo I was keen
to do a loop route that would get me back to my start point. I had found two options and would make the
final decision about which to use during the tramp.
A final note: As you will read I lost the use of my iPhone camera early in this trip and consequently I have used photos from 'the cloud' to fill in the visual gaps. Where known, credit for other people's photos is indicated.)
[Edit: A local iPhone rescue dude was able to restore my iPhone sufficiently so that I could retrieve the photos I'd taken up until the river mishaps - these have now been inserted.]
[Edit: A local iPhone rescue dude was able to restore my iPhone sufficiently so that I could retrieve the photos I'd taken up until the river mishaps - these have now been inserted.]
 |
| Location of Arthur's Pass (Map credit: backpack-newzealand.com) |
Day 1: Monday 4 Feb - Waimakariri River Bridge to near Anti Crow Hut (4hrs)

 |
| Arthur's Pass Village (sans rain) |
The woman at the Parks Office warned me that the rain may be
affecting river levels and to be cautious. To help make her point, she showed me the before and after pictures of a river going into flood. She also mentioned
that there is a hotel 1km east of Waimakariri River bridge where I could
safely park my car, if I get the hotelier’s permission. I
thanked her and headed off in the steady rain.
The guys at the hotel were as accommodating as the woman had
indicated. I bought a $4 espresso as a
show of thanks, downed it quickly, then returned to my car to gear up and get
out.
There was a steady drizzle as I prepared to leave so I donned my new packa - a silnylon rain coat that also covers a pack, like a poncho, but with sleeves. Apart from the packa I was also using some other items for the first time, including a pair of Black Diamond Distance FL Z-pole walking poles I’d picked up the week before. I also had on a new pair of New Balance MT810 trail runners. More on these later.
 |
| View of the Waimakariri River. The BB Track starts in the bush where the bridge meets the road on the left then follows the bush line away from the camera. The scene I saw was overcast and grey. (Photo credit: kiwinz Flickr) |

Initially the track wound through bush, later moving out onto the braided river plain.
 |
| Emerging from the bush onto the Waimakariri River valley |
 |
| Waimakariri River |
 |
| Waimakariri River valley |
 |
| Waimakariri River valley |
 |
| Waimakariri River valley |

After about 2 1/2 hours I came to Anti Crow Hut.
 |
| Anti Crow Hut - A good place for a quick rest. |
 |
| Late lunch at Anti Crow Hut |

 |
| Departing Anti Crow Hut |

From here the route continued to follow the river valley floor and a number of river crossings would be required. It was about this stage in the journey that I discovered the effect of the earlier rain on the river, which, while OK to cross in normal conditions, was now just high enough to be problematic.
 |
| No place here for dry shoes |
 |
The first river I had to cross. I wasn't game to try at this location and instead crossed at deep, slow section just at the bend to the left of the picture.
This is also the last photo I took with the iPhone...
|
River crossing
For the first crossing I found a section where the river had formed a deep, slow moving eddy to one side. I could see the bottom and it looked to be about 1 to 1 ½ metres deep. It turned out to be much deeper than that and after a few steps I found myself up to the neck and swimming frantically with my two walking poles. It got to the far side easily enough, but I was drenched.
The next braid I had to cross had no slow sections so I decided to give it a go in what seemed to be the least deep/fast section. I got 3/4 of the way and found myself in thigh-deep, fast-moving water and barely able to stand while I stabbed wildly with the poles to try to stay up. Seconds after I realised I was way out of my depth I toppled in to the river and started to be swept downstream. Fighting the current, I scrambled to the far bank, eventually reaching shallower water where I was able to crawl out using the rocks on the riverbed.
Not only was I now soaked for the second time I had also managed to lose one of my new walking poles due to not having the wrist straps secured. Shit! Worse was to come.
Light was fading as I came to a third braid, just as fast and deep as the last. As much as I wanted to get to Carrington Hut that night to keep the schedule on track, the last two crossings had shaken my confidence somewhat and the crossing looked too dicey. I therefore decided to stop and camp for the night and hope for the river to drop by the next day.
 |
| Fading light on the Waimak - time's up for river crossing (Photo credit: scott28w Flickr) |
I found a decent camping spot on a grassy, treed area at the edge of the valley, away from the river. I had planned to use my walking poles in combination to form the tent pole, but with one of the poles now somewhere down the Waimak, I needed a new solution and I used my Gerber camping knife to cut up a tree branch to make an improvised tent pole.
Once the tent was up I unpacked to see what sort of damage the river dunkings had wrought. I discovered first that my only map was wet, though would dry okay. More significantly my iPhone had also gotten wet and was now showing every indication of being dead - even though, like the map, it had been stored in press-lock plastic bag (albeit in my jacket pocket). The loss of the iPhone was a serious pain in the arse - I had intended to use the iPhone as GPS, camera, e-reader, iPod and back up phone. Shite! (Although I still had a video camera, which could also take photos, it had only limited battery life).
My reactions following the unplanned river swim
Feeling very chastened, I cooked a Back Country Cuisine dehydrated dinner (Chicken - quite nice), then settled under my quilt.
It was a cold, shivery night in wet underpants – I wore them on the theory that my body heat would dry them. To be honest, I really could have used a dry change of pants- ideally, some nice, warm thermal underwear.
It was hard to get to sleep. I was worried about the river levels – would they drop sufficiently the next day so I could continue? I also realised that my map did not cover the entire route - I hadn't given this full attention when buying it at the Park Office as I had loaded all the necessary maps on my (now unresponsive) iPhone. It was also a little blustery in the valley overnight, but there was decent shelter in the grove where I'd positioned the tent.
Day 2: Tuesday 5 Feb - Near Anti Crow Hut to Carrington Hut (2hrs)
I awoke to clearing skies, then slept in while waiting for the
sun to rise as a few sand-flies found me.
Breakfast of muesli and (dried milk) and sent the “I’m Ok” message via
the Spot 2. The little creek near my tent had dried up
which was a pretty good sign that the water levels had dropped overnight and a walk
to the river confirmed this. I let my clothes dry a bit before packing up and
crossing the river, which proved to be straightforward with the lower water levels.
A look at the Waimak the next morning
 |
| Drying out |
 |
| The inner sanctum. You can see the makeshift tent pole at centre |
Met a couple on their way out. They had the Otira map that covers a wider area and when I requested for them to let me take a couple of photos of it, they happily agreed. However, they were a bit taken aback by my plan to use photos of a map as navigation and instead offered the map to me. I was very pleased with this offer and tried to dig out $20 as payment, but the money was stuffed down the bottom of my pack and the good folks, after a minute of watching me farting around with my pack, told me not to bother. Oh well - I tried! In any event, I really appreciated the kindness of strangers!
A little later I was passed by two guys going like the clappers in the same direction as me. I made an attempt to match their pace, but their were really motoring!  |
| Waimakariri River |
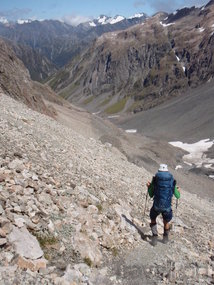
The river valley was a stunning place. Either side of wide braided river floor was walled by steep, rugged hills, rising to 1700-2000m.
.
 |
| The author with the Waimakariri River valley in background |
 |
| Mt Campbell |

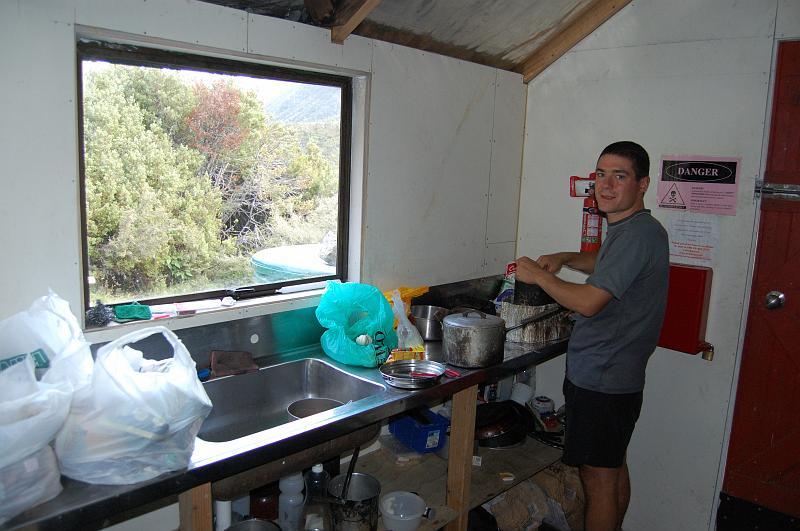
Two hours from my camp site I arrived at Carrington Hut. "Hut" seems in inadequate word to describe this hotel in the bush, which includes 38 beds with mattresses, 2 living areas, cooking areas, tank water, a chemical toilet and a radio back to the Arthur's Pass centre.
 |
| Carrington Hut |
 |
| Bunkroom at Carrington Hut |
 |
| One of two living areas at Carrington Hut |
I had a few hours to kill, so I had a snooze in my bunk then did a walk up the Upper Waimak towards Mt Carrington. Beautiful valley.
 |
| Carrington Peak |
 |
| Near Carrington Hut |
 |
| Moraine on the Upper Waimak River |
 |
| Taipoiti River near Carrington Hut |
 |
| Peaks north of Carrington Hut |
Carrington Hut would be an interesting place when it's full. As it turned out we ended up with about 10 people there for the night, including the two speedsters from earlier in the day. I found out they were DOC (Dept of Conservation) staff and they'd just gone up to Barker Hut to conduct a bi-annual inspection. They had basically done a 15 hour walk in about 10 hours! They admitted to being 'shattered'! We got to chatting about the huts. Apparently Carrington Hut gets several hundred visitors a year. By way of comparison, Barker Hut might only get around 100 visitors in the same period.
I asked them about my plan to loop back from Browning Pass to Julia Creek, via Popes Pass. They seemed to think it was doable - they'd heard of people taking this route in the past. "Give it a go" was the final comment, delivered with a reassuring smile. Gotta love that Kiwi attitude. I also got to know a couple of Aussies - Matt & Graeme, from NSW - who were heading the same direction as me the next day.
Dinner was a Backcountry dehydrated meal. Yum. Before retiring I sent the “I’m OK” message to my wife with the Spot 2. I had brought along ear plugs for the hut but it was mercifully quiet in the hut that night and I got a good sleep
Day 3: Wednesday 6 Feb - Carrington Hut to Park Morpeth Hut via Harman & Whitehorn Passes (10hrs)
The DOC guys were gone before dawn, their boots clumping
around the hut for a while then off into the darkness. I got up shortly thereafter, at 6:30am and,
after a breaky of meusli & milk powder, was out by 7am, after sending an Ok
message to my wife with the Spot 2.
I made good time alongside the Taipo River to where it meets
the White River. The Clough cableway is located there, but the water levels were low enough for a direct crossing - although I did have
to stuff around for 10 minutes to find a decent place to cross.
 |
| Clough Cableway |
The route to the Harman Pass involves walking up the Taipo River, via a gorge, over rocks and boulders. I found it fairly slow going, but loved the amazing scenery, with the steep, high walls and the frequent waterfalls. I was really regretting getting the iPhone wet and with it my camera. (As mentioned earlier, although I did have a video camera it had limited battery life.)
.jpg) |
| Waterfall in the gorge section of the Taipoiti River , near Harman Pass (Photo credit: onegirlworld.com) |
At one point I noticed a couple of blokes coming up the gorge about 100m below me. I was surprised when the two had caught up with me only a few minutes later. They were very fit looking dudes, who told me they were trail running a route that normally takes a few days. I was impressed by this and asked if they were training for the Coast to Coast race, a hard core, 1-2 day event involving river kayaking, road cycling and running, being held in a few days time. They told me that they were participating, but as support crew for one of the racers. (Only support crew!?) We said our goodbyes and as they blithely scampered up the rocks, I pondered on the the joys of extreme fitness.
More @&% pole hassles
Almost immediately, I slipped and succeeded in putting a massive bow in my (remaining) walking pole, when it got jammed in between some rocks. Fortunately I was able to get most of the bow out of the pole without the thing snapping - kudos to the folks at Black Diamond. I managed to get another dozen steps up the gorge before I slipped again on a steep section, badly crushing the end of a finger in the process. I got a bit tentative for the rest of the climb.
.jpg) |
| Upper section of Harman Gorge (Photo credit: ben-b.net) |
 |
| View towards Taipoiti river from Harman Pass Photo credit: Matt Rudge |
 |
| View towards Whitehorn Pass from of Harman Pass Photo credit: Matt Rudge |
We parted ways and I headed up towards Whitehorn Pass. The route involves passing some mountain tarns, then a longish scramble over a glacial moraine, with huge boulders
 |
| Tarns at the top of Harman Pass (Photo credit: tramper.co.nz) |
I finally came to the base of the ice field, thinning edges overhanging the river below. I didn't trust the strength of these edges and instead traversed to the right, along a steep, loose moraine, eventually finding a suitable access point.

According to the DOC guide, crampons and an ice axe should be used on this icefield. I'd bought a pair of Kahtoola Microspikes for just this purpose and fitted them to my runners before proceeding. (I had asked about hiring an ice axe at the Arthur's Pass Office, but they told me they don't provide that service. I figured the spikes would suffice.) The spikes worked well for the most part, gripping the ice firmly. Only when I neared the final, much steeper 20 metres did it get a bit hairy and I had to drive my feet in at a 45 degree angle to maintain traction.
Bergschrund
Just short of the top of the pass, the ice is replaced by gravel & rock. As I went to step up to the rock I slipped into a small bergschrund (a type of crevasse) and found myself sitting on its edge, with one leg in the 'schrund, one leg out. I saw that it narrowed and closed off further along, so carefully slid in that direction until I could easily climb out. Nerves on edge, I stepped off the ice sheet onto the gravel and ascended to the top of Whitehorn Pass.
.jpg) |
| Permasnow on the eastern face of the Whitehorn Pass Photo credit: Nadine - TripPod Member - tripwow.tripadvisor.com) |
The views were magnificent. Most impressive was Cronin Glacier and the massive drop off below it to the Cronin Stream below. I took a few minutes to soak it all in before heading off down a zigzagging path through a steep scree slope on the other side of the pass.
.JPG) |
| Cronin Glacier from top of Whitehorn Pass Photo credit: hilandtom.com) |
 |
| Cronin Glacier Photo credit: Nadine - TripPod Member - tripwow.tripadvisor.com) |
 |
| Descending the moraine from Whitehorn Pass to the Cronin Stream Photo credit: Nadine - TripPod Member - tripwow.tripadvisor.com) |
.jpg) |
| Looking back to the Cronin Glacier & Whitehorn Pass (Photo credit: http://homepage2.nifty.com/treknz/e_threepass.html). |
.
.JPG) |
| Lower section of Cronin Stream (Photo credit: roddus.blogspot.com) |
.jpg) |
| Approaching Park Morpeth Hut (Photo credit: Peter Scott - zoneblue.org) |
This hut is run by the Canterbury Mountaineering Club. It was built in 1931 and named in memory of two men who drowned nearby. It is in great nick and was a nice place to spend a night. I had a wash in the nearby, cold waters of the Cronin Stream, while also soothing my sunburnt legs, before sending an “I’m Ok” message to my wife, then settling in for the evening.
The hut includes a solar powered light and a bunch of interesting magazines and club annuals – the latter dating back to the 90s – so along with frequent reviews of the route on the map I had plenty to keep myself occupied.
 |
| Inside Park Morpeth Hut (No, that's not me) Photo credit: hilandtom.com) |
A key decision for me that evening was whether to use Pope Pass to get to Julia Hut (then loop back to Harman Pass and the start) or to take a more circuitous path – adding 1-2 days - via the Arahura River and Newton Pass to Julia Hut. Reading the hut visitor book I found entries by a number of people who had done or planned to do the Popes Pass route; however, an entry by solo tramper stood out – he had had to abort an attempt at this route due to a sheer section that would have potentially trapped him. I was also concerned about my ability to navigate through this rarely travelled route, given my lack of a GPS and with a thought to how easy I’d lost the way at Harman Pass earlier that day. In addition, it looked like the route down Julia River from Popes Pass might be badly over grown. I went to sleep feeling not particularly positive about Popes Pass.
Googlemap location
Day 4: Thursday 7 Feb - Park Morpeth Hut to Mudflats Hut via Browning Pass (11hrs)
Another quick breaky of muesli, milk powder & water. It was a little stodgy, but at least it was filling. The sky was clear and it was looking to be
another warm day. After sending the Ok
message to my wife with the Spot 2, I was on the trail early, walking up the
true left of the Wilberforce River and arriving at the base of Browning Pass after
an hour. The track from here follows a
zigzagging pathway, cut into the mountain by miners in the 1860s. As I approached the bluffs the miners trail
was replaced by a clear footpad, presumably maintained by DOC. The trail led up into the edge of the
scree.
A heart thumping ascent
From this point it got very steep. I carefully climbed and scrambled up the left
side of the scree. At one point I tried
traversing a large Volkswagon-sized boulder by going into the scree. However, my path was blocked by a
large rock. I went to grab the rock, to pull myself up and over it, but the rock started to move towards me and I had visions
of the rock and myself plummeting down the scree.
With heart rate hovering around 180 (just guessing), I (even more)
carefully, extracted myself from the rock and moved back under the large
boulder then continued on up the left side.
A short climb later, the cut track reappeared and with a
sigh of relief I made my way up the final 30 metres to the top of the
pass.
2.jpg) |
| Southern approach to Browning Pass. You can just make out the zigzag of the old miners' path, which reaches to the base of the centre scree (Photo credit: tramper.co.nz) |
The views south from the pass were awesome! This was also the point where I had to make the final decision on whether or not to use the Popes Pass option. As it turned out there was low cloud over the route to Popes Pass and I decided that without a GPS I would give Popes a miss and instead take the extended route, via Harman Hut and Newton Saddle.
.jpg) |
| View south of Wilberforce River from Browning Pass (Photo credit: danny.oz.au) |
From Browning Pass I walked around Browning Lake then descended via some stunning, craggy and steep high country, passing bluffs, waterfalls and rocky avalanche paths, eventually arriving at the Arahura River. From there is was the now-usual rock hop down the river, later joining a trail on the true left.
.jpg) |
| Lake Browning (Photo credit: danny.oz.au) |
.jpg) |
| Stoat trap (Photo credit: ascensionatsea.com) |
Stoats
From this point I started noticing stoat traps every 100 metres on so on the trail. Stoats, introduced to NZ in the 1880s in what is considered one of the colonists’ worst conservation mistakes, have flourished in the largely predator-free, virginal NZ. In this area near the Arahura they have played particular havoc on the native blue duck or “Whio”, whose population was on a steep decline up until the last few years, when the stoat trapping program began in earnest. The trapping has been hugely successful, with stoats being almost eradicated from some areas, with a consequential rise in Whio numbers. I think it was a good indicator that I must have passed over 100 traps across the next few days and not one had a stoat in it.
 |
| A 'cute' stoat |
.jpg) |
| The endanger Blue Duck "Whio" Photo credit: greatlaketaupo.com) |
I stopped for lunch at Harman Hut – another typically well-equipped and well-maintained hut.
.jpg) |
| Harman Hut (Photo credit: tramper.co.nz) |
From Harman Hut I headed to Styx Saddle, crossing a cool swing bridge on the way. From this point the trail followed a fairly consistent contour, along a “bench track” as the kiwis call it. The wide track was another example of the amazing efforts of miners from days long past. For me it meant I got to do some really pleasant walking for a couple of hours, enjoying the native bush, without having to constantly think about route finding – or even where to put my feet! I was even starting to think what a great place this would be to bring my wife and daughters...
 |
| Cable bridge near Harman Hut |
 |
| A section of the very pleasant 'bench' trails along the Arahura River |
Rope climb
..It was about that point when I came to a section where the track had been washed out with a 5 metre deep drop to the landslide. While it was straight-forward enough to get down to the washout, the steep bank on the other side was a bit problematic, as DOC had elected to hang a rope, rather than cut steps. I tied my pack to the rope, then pulled myself up the 5 metre vertical face to the ledge where the track resumed. I then hauled my pack up the slope. The whole rope climb/pack haul thing was quite difficult and while I wouldn't suggest that women couldn’t do this, it would definitely be challenging for anyone not able to do a few chin ups.
Mudflats Hut
After 4km and a couple of hours walking from Harman Hut I crossed another cool swing bridge over the Arahura and climbed a steep embankment to Mudflats Hut. It was evening now and I decided to stop here for the night. This hut was a little rougher in finish, but it was nevertheless well-equipped, with pot-belly stove, 4 bunks, table & chair and a long drop dunny.
I made myself dinner (a Backcountry dehydrated meal), had a wash and sent my nightly message to my wife using the Spot 2. It was a cold night, so I fired up the pot belly wood burner. Really took the edge off the cold nicely.
I passed the time re-checking the route by map and reading conservation magazines. I found the conservation stuff really fascinating. Apart from the great work being done by the NZ government, there is an army of volunteers doing some amazing stuff. In fact, in NZ they did a TV show in which they featured different conservation volunteers each week. It’s called “Meet the Locals” and I found out on returning home that they can be accessed online here: http://tvnz.co.nz/meet-the-locals/video.
.JPG) |
| Mudflats Hut (Photo credit: tramper.co.nz) |
Day 5: Friday 8 Feb - Mudflats Hut to Newton Creek Hut (7hrs)
My plan for the day was to get across Newton Saddle, then onto Julie
Hut. This would make for a long day, so
after a (even stodgier than the day before) breaky of muesli and sending the “I’m Ok” message with the
Spot 2, I headed off. I crossed the
swing bridge from the day before, did a short, steep climb, then followed a
bench track alongside the Arahura River.
Bush bashing Part 1
After an hour I had come to the point where there should have been a
track down to the Arahura River and a swing bridge. However, I could find no sign of anything
resembling a track. I elected to follow
the Third Gorge Creek down which was in the general vicinity of where the map said the track was located. Descending the creek involved a lot of wading in the creek, sliding down boulders and pushing
through overhanging branches. It wasn’t
particularly pleasant, so I was very happy to arrive at the Arahura River about
an hour and a half later. A swing
bridge took me across the river.
.JPG) |
| Bridge across Arahura River to get to the Newton Creek track |
Bush bashing Part 2 & the Disappearing Spot 2
After a glance at the map I looked for a track that would follow another creek up to the spur above. There was a dried up creek bed close to the swing bridge and although there was no obvious track up the creek, based on the bash I had just done to get to the river I figured that trampers were expected to do more bush bashing to get up the other side. Decision made, I started walking up the creek bed, then after about 20 metres, headed up into the bush to the left of it.
Note: I would eventually find out that this was NOT the correct route, but not before having a particularly shitty experience.
Note: I would eventually find out that this was NOT the correct route, but not before having a particularly shitty experience.
The slope was very steep, very slippery and covered in very thick bush. It took me ages to get anywhere, with branches clawing at my body and pack and vines tripping me up. It was exhausting work and after about an hour of this I removed my pack and stopped for a rest. While sitting there feeling sorry for myself, I glanced at the pack and with a sickening feeling in my stomach I realised that my Spot 2 was gone! Sometime during the scrambling through the thick bush, the Spot had been torn from where it had been attached to my shoulder strap!
 |
| Stunning NZ bush |
Apart from the $170 replacement cost of the unit, the loss of the Spot 2 presented a couple of major problems: For one thing, I now did not have an SOS capability and that couldn’t have happened in shittier, more secluded place. For another - and probably of greater concern - my wife and I had agreed on a protocol for the Spot whereby if she didn’t get the “I’m Ok” messages from me for 24 hours, she was to alert search and rescue; unfortunately, at this point I was semi-lost on this crappy spur and still had at least 2 days before I could get to a phone.
I slowly bashed and scrambled my way to the top of the spur, then made my way along it, towards where the next hut was supposedly located.
Despite my generally gloomy mood I did from time to time pause to note just how beautiful and wild the bush was in this place. There were huge trees everywhere, many of which had large boulders at their bases, under which were dark, crevices and caves, full of mystery.
I gave a whoop when after 2 ½ hours of this bush bashing I came to a well-cut and marked trail. Without hesitation I set off to the right, following the trail down a steep, knee-jarring decent, finally coming to a river after about 20 minutes.
The location confused me a bit as the river wasn’t flowing in the direction I would have expected and a quick check of my compass confirmed this. About 30 metres down the river I found a swing bridge, but there wasn’t supposed to be a swing bridge here. I then realised with a sinking heart that I had made two major errors: (1)The track I had just descended was the actual track from the Arahura that I was supposed to climb ie. there had been no need for an insane bush bash; and (2) In my confusion when coming off the spur, I had taken the wrong direction on the last track, turning right instead of left and the swing bridge was the same one I’d crossed 3 hours earlier!!!
Feeling very stupid and equally tired I forced myself back up the steep track back onto the spur, then down to Newton Creek, finally reaching Newton Creek Hut about 90 minutes later, around 3pm. I was feeling shattered and ate a lunch of salami and cheese while resting my tired legs and taking stock of the situation.
Per the hut visitor book it could take 6-10 hours to complete the next section – crossing Newton Saddle to Dillon Hut - depending on fitness and conditions. The conditions were nice enough but after the intense walking of the day, there was no way I was going to get there in 6 hours. It would be more likely 8 hours, if not more. That being the case it was now too late in the day for me to attempt the crossing and I resigned myself to settling in at Newton Creek Hut for the night.
I also decided two things: Firstly, I was going to have to change my route, taking me to a highway where I could flag down a motorist and borrow their phone to let Tania know I was ok. Secondly, I was going to have to really mission it the next day to get out quickly.
I gave my aching knees some cold water therapy in the river – it felt great, but the water was too cold to stay in more than 10 minutes. Near the hut I spotted some ducks, fossicking around in the bush nearby. I think they were Whio’s but I wasn’t certain. There were a lot of branches and sticks in the wood shed and to pass some time, I chopped and broke these up, ready for the pot belly.
I made myself a Backcountry meal (I really like these!), then settled in with a copy of James Michener’s “Alaska” that someone had kindly left. It was a pretty good read and 50-odd pages later I drifted off to sleep. In the back of mind was the thought that I my wife would be wondering about the lack of the nightly ‘I’m OK” message.
 |
| Newton Hut (Photo credit: Peter Scott - zoneblue.org) |
Day 6: Saturday 9 Feb - Newton Crk Hut to Dillon Hut via Newton Saddle (12hrs)
As was now my habit I was up at dawn. I forced down some of the now intensely stodgy muesli, but could only get halfway before throwing
out the remainder in my plate. By now, I had gone without sending a second “I’m OK” message and I knew my wife would be getting anxious.
I changed the tape on my toes, then it was onto the trail, which followed Newton Creek up to its source at Newton Saddle.
I changed the tape on my toes, then it was onto the trail, which followed Newton Creek up to its source at Newton Saddle.
The first section required getting over and past large
slippery boulders. Later the boulders were replaced with rocks and after what
seemed a very long time I reached the saddle.
.JPG) |
| Upper section of Newton Creek (Photo credit: Peter Scott - zoneblue.org) |
From the saddle I slid down steep, tussock-covered slopes to Dunns Creek. From there it involved rock-hopping down the creek for a few kilometres. It was quite fun, but was hard on the knees and hips.
I eventually arrived at Dunns Creek Hut, where I stopped for lunch, consuming the last of my salami and cheese. A review of the visitor book indicated that the track down Dunns Creek, though not maintained by DOC, had been recently improved by volunteers and would be the fastest route out to the highway.
 |
| Dunn Creek Hut (Photo credit: tramper.co.nz) |
I found the start of the track not far from the hut. It was well marked and cleared. (Kudos to the guys from Permolat!) I made good progress until I reached a large avalanche section, where I got confused looking for the track on the far side of the rock slide, before finally deciding to descend the rock slide to the river. It turned out that that WAS the correct route – I just hadn’t picked that up from the notes. Oh well, it was just good to know that I wasn’t lost.
The route from this point on involved more rock hopping, eventually reaching the confluence with the Taipo River. I have a hip condition and by this point my legs were starting to feel the strain from the intense last few days and the extended, down climb of the rivers in particular. I had to dig in a bit mentally to keep the pace up, constantly reminding myself of the by-now worried family and their impending call to S&R.
.JPG) |
| Taipo River, near merge with Dunns Creek (Photo credit: tramper.co.nz) |
A note in the Dunns Creek Hut visitor book had recommended making a direct crossing of the Taipo, to avoid having to use a cableway further down river (and a steep climb to and from it). However, I couldn’t find anywhere safe to cross (lessons learned from day 1 of the tramp!) and instead took the standard route down the true left. I came to the track leading up to the cableway and it was indeed very steep, involving half-walk, half-scramble.
.JPG) |
| Taipo River (Photo credit: Peter Scott - zoneblue.org) |
Cableway
30 minutes later I had come to the cableway, which is basically a metal platform, hanging from a thick cable, which you winch to and fro to cross the river. For groups of 2 or more, there are winch handles on each side and these can be rotated quite easily to move the platform across the river.
Using the cableway is a bit more challenging for the solo traveller, requiring you to use a metal bar (lever) with a couple of hooks at one end. To start off though, you simply climb onto the platform (don’t forget your pack!) and release the brake, sending the platform flying down the cable, where it eventually comes to rest at the lowest point, in the centre of the river. You then hook the lever to the main cable and repeatedly pull on it to haul yourself 30-40 cm at a time in the direction you want to go.
This proved to be easy enough at first but got harder as I approached the far bank, where the cable had the sharpest angle. The final section took quite a bit of huffing and puffing. Seriously, I do not think this is something a female (unless you’re the Sigourney Weaver type) or child would be able to do, so I recommend ladies and kids should tackle the cableway in groups.
.jpg) |
| Cableway across the Taipo below Dillon Hut (Photo credit: onegirlworld.com) |
With that bit of manly action out of the way I headed down the right bank. The route at this point is a bit confusing. From the cableway you head down to the river, then immediately climb back to the terraces. The maps indicate that you follow a path close to the river, but various markers have you walking through scrub and grass away from the river.
I arrived at Dillon Hut at 6:30pm, where I rested for 10 minutes before heading off again. My plan was to get to the highway that evening or, at the very least, get very close, so I could camp and then be at the highway early the next morning.
However, I walked 10 minutes before I realised that I’d left my walking pole back at Dillon Hut. By the time I got there it was 7pm. It was getting dark and I was feeling quite knackered. As much as I desperately wanted to get to the highway that evening, I still had a 2-3 hour walk to go and I really didn’t like the idea of finding my way along the river in the dark. It occurred to me that it was also a little unlikely that I would be able to get hold of anyone at the highway after 9pm.
Decision made, I stopped for the night at Dillon Hut. I knew that at this point my wife would have noticed that I had now missed three “I’m OK” messages in a row and would almost certainly have alerted S&R. [Ed. She had.], not to mention being worried sick.
I had a meal of Back Country Cuisine (my second last one), then occupied myself with an old copy of The (Christchurch) Press newspaper, reading 4 month old news and completing the crossword. Between worrying about my family and aching knees, I didn’t sleep too well that night.
.jpg) |
| Dillon Hut (Photo credit: Panoramio.com) |
Day 7: Sunday 10 Feb - Dillon Hut to state highway (2hrs)
I was up well before dawn. I gave the muesli a miss – just thinking about eating the stodgy gloop made me feel nauseous – and instead had an instant cappuccino mix. Suitably fired up I hit the trail.
It turned out to be a straightforward walk out, following a four wheel drive track all the way. As I approached the river mouth the 4WD track passed over a spur, providing the opportunity to get the blood pumping one last time before I descended from the spur to where the track met the coast highway. I'd started to badly cramp up in my calves when, 2 hours after I’d started walking, I arrived at the exit point. I’d made it!
As fate would have it there was a farm house directly opposite the track entrance and I spotted a girl about 9-10 years old playing with some dogs outside. I called to her and asked her if she could ask her parents if I could use the phone. She quickly ran inside and a few minutes later the farmer came out, holding a cordless phone. I explained the situation and that I had to call my wife in Australia and offered him $5 for the expense. He agreed, handed me the phone then walked off to give me privacy.
The call home
I quickly dialled home and was rapt to hear my wife answer the call.
“Hi, Tania”, I said.
“Who is this?”
“It’s me, Andrew- ” I had to stop for a few seconds to collect myself for I’d suddenly felt a surge of emotion welling up. The sustained effort and worry over the past few days were finally over and the relief came over me like a wave. I couldn’t believe how happy I was to hear her voice.
“I’m Ok”
And it was clear that she felt the same about hearing mine:
"You bastard!"
Sure, she bagged me out a bit – she had every reason to – but the overwhelming feeling for both of us was relief.
“I’m Ok”
And it was clear that she felt the same about hearing mine:
"You bastard!"
Sure, she bagged me out a bit – she had every reason to – but the overwhelming feeling for both of us was relief.
She confirmed that she had alerted S&R and said that they had planned to mobilise that morning. With that news we ended the call quickly so that she could contact S&R to let them know I was ok. (I later found out that they had been on the runway ready to leave when she called them that morning)
I thanked the farmer and handed his phone back, then set myself up on the side of the road to hitch a ride back to my car, about 20 km away.
Hitching
There wasn’t a lot of traffic on that Sunday morning and no-one seemed too interested in picking up a lone male hiker. Nevertheless, I always gave the passing cars a wave and a smile and this eventually paid off when after about an hour a car doubled back to offer me a ride. My good Samaritans, Rex & Jinni, were great company. We shared a snack at Arthurs Pass, then they dropped me at my car, heading off with a wave.
It was 10am when I had finally stowed my pack, donned my thongs and jumped in the car for the 2 ½ hour drive to Timaru and the end of this particular adventure.
This trip had its fair share of troubles and challenges, but overall I have say I had a great adventure in what is an amazing part of the world. I will definitely be back soon..
This trip had its fair share of troubles and challenges, but overall I have say I had a great adventure in what is an amazing part of the world. I will definitely be back soon..
Resources
- NZ Department of Conservation site for 3 Passes Route
- Arthurspass.com
- Arthurs Pass Mountaineering
- www.tramper.co.nz
- DOC maps site
- Trip intentions site
Gear Reviews
Packa Having bought the Packa at the start of a very dry spring/summer in Melbourne, the wet first day of this trip was the first opportunity to use the Packa. I found this half coat, half poncho to an effective rain shield. The hood worked well including the peak. After falling in the river a couple of times I found that the pack outer had been kept reasonably dry. Overall, I was pretty happy with it's first run.
Spot 2

New Balance MT810

I bought these prior to this trip also. I was looking for light, strong, breathable, quick drying trail runners. After many kms travelling through bush, rivers, alpine trails and a ton of rock hopping I can say that these are pretty good hiking shoes. The protective strip around the toes could be a bit longer, giving more protection from rocks. I also thought they would dry more quickly than they did. In practice, the drying was a non-issue really due to the frequent river crossings required on this trip. Finally, despite the serious workout on rocks these shoes got, the soles have held up very well.
Black Diamond Distance FL Z-Poles

I bought these poles for this trip as I needed a walking pole that could be easily carried on a plane - my usual tall bamboo staff was too fiddly I figured. I lost a pole on the first day in a river crossing when I didn't have the wrist strap on. I used the remaining pole for the rest of the trip. I found it light, easy to manipulate, the grip was comfortable and for the most part I trusted in the strength of the pole. The one exception was when I slipped over, and with my body weight causing lateral pressure, the pole bent into a bow shape. I was able bend it back to almost straight and was thereafter much more careful about not letting it get snared in holes.
Kahtoola Microspikes

I bought these specifically for the ice climb on Whitehorn Pass and they did the job well. When the slope got very steep I found I had to shove my feet hard into the ice at a 45 degree angle to get sufficient traction. They were also easy to put on and take off.
Montane Litespeed Windshirt

This is a very informative and educational report. Regarding river crossings I often arrive in Lapland at towards the end of snow melt so rivers are high and flowing fast, my plan of action is, ensure that everything is tucked away as best as possible, ensure that the poles straps are tightened so I don't lose them, have no more than one buckle attached on the pack (hipbelt) in one instance because of the speed of the flow and depth even the hipbelt was undone and then slow and steady. I never experienced such challenges in Oz.
ReplyDeleteI am glad to hear that the BD pole withstood a lot of sideways force, as I think that is the area that poles will most likely fail in. I love my BD Flicklock Z poles and your comments have encouraged me to take them on tour this summer in Lapland.
Spot is a conundrum, if all works then it is the perfect device for solo hikers in remote locations. But, if something goes wrong such as batteries die, spot dies, ... then given the expectation of messages there is a problem, which I would call a false negative. Every year before going to Lapland my wife and I discuss whether I get a Spot or not, the answer is always no, we rely on mobile phones with a recognition that I may go for some days without a signal. In this way the last known location is given, and given the expected route then I should be able to be located if needed. This has worked for us so far. Generally my mobile phone is turned off during the day and in my pack so it is protected from the weather.
And yes I can very much relate to the feeling of relief when a response from a loved one is received, it clearly indicates our connection to significant others.
Your final sentence is priceless "donned my thongs" lucky you waited till you were at your car otherwise no one would have picked you up, ; ).
I look forward to hearing more about the Packa
Hi Nielsen. A well-considered comment (as always!)
DeleteIt's been a long, dry summer in Oz, but hopefully we'll get lots of rain soon so I can get the Packa out again.
Should I have called them "jandles" perhaps? I was in NZ after all :)
OMG I'm exhausted reading that. What a trip. Congratulations. Was the wedding before or after?
ReplyDeleteHi Jim. You and me both! The wedding was before. I used the hike to work off the cake and booze. :)
DeleteI missed this post the first time round Andrew, but I'm glad found it! Great read and I can understand the anxiety from both sides in these situations.
ReplyDeleteThe one thing I've learnt from your post is that I need to get over the NZ!
Yes, go to NZ as soon as you can!
ReplyDeleteDisappointing to see someone else inadequately prepared heading into the bush with the expectation that S&R will rescue them. S&R are volunteers and their time and the tax payers money can be spent on better things, like hut and track maintenance. Get a friend(s) to tramp with, buy a decent map and compass and stop relying on a battery powered piece of technology to find your way. Enjoy the NZ outdoors but do it safely and no risk to others.
ReplyDeleteGB Thanks for the comment. However, I don't think you read my post fully. I DID take a map and a compass - and I know how to use both. I also took a variety of survival and emergency gear for SHTF situations. Unfortunately, the Otira map that I bought at the parks office in Arthurs Pass was a truncated version of the map sold elsewhere and did not cover the entire area of the walk. No, I didn't check - I'd assumed it would be the same coverage, so my bad. Losing use of the iPhone was a bummer, but not critical to the trip. The later loss of the Spot 2 beacon was also a bummer - I'd lost the back up of last resort (which I would be reluctant to use anyway) and the inability to signal my wife created a comms problem. Again, this was non-critical. Actually, I think I was pretty well prepared. For the record, I would make every conceivable effort to self-rescue before I would involve S&R. While it is my right to be rescued, I have no intention of depending on this service.
ReplyDeleteMate, face some reality
ReplyDeleteYou were out of your depth: you were making serious errors from start to finish
Your deluded ability puts others at risk, and helps paint those who have the ability with the same brush
Great photos
Hi. I can't respond directly to non-specific criticism. That said, I suspect my response to GM below will apply here. Glad you like the photos - as mentioned in the post there were a number of contributors to these.
ReplyDeleteYou made soooo many mistakes. But I'm a self-trained hiker as well, and I made them all too: I'm just glad you got yourself out before any damage was done. If you want get into it but aren't lucky enough to have a Kiwi hiking mentor, what are you supposed to do? Keep the couch warm? And old hands who bitch at newbies for 'putting SAR at risk' are just being elitist. SAR workers LIVE for rescues, and not a one of them in this country ever died on the job.
ReplyDeleteHi Shrike This post has certainly attracted a few heavy-handed critiques, which for the most part I disagree with (Tho crossing the Waimak when it was high was def a poor decision). A spirit of adventure - of having a go and making it go right - is something I value in myself and in others when I find it. I don't spend a lot of time paying attention to those who sneer or jeer when I stumble from time to time.
ReplyDeleteGood for you. In any field you'll get 'veterans' dissing 'noobs'. Despite the hyperbole, you're only putting your own life at risk soloing in the NZ back-country so if you've got the stomach for it go.
ReplyDeleteSome friendly tips:
-Do more online research on your routes: contacting local tramping clubs yields awesome info. Eg, There's a high-water track along the true right of the Waimak.
-Attach nothing you aren't willing to lose to the exterior of your pack. Your emergency SOS device goes in the ZIP pocket of your shorts and only comes out when you're going to use it (so even if you get battered and lose your pack, in a fall or a blown water crossing, you may still be able to deploy it).
-Spend more time developing your packing checklist system. CANNOT be forgetting the sunblock!
-Divide your gear into two categories: items which can get wet, and items which cant. Everything on the latter list HAS to be carried in dry bags. These are far more effective than pack-liners and pack covers.
-Get the nztopomap app for your phone (and be sure to cache the relevant areas while still in wi fi range). This app also syncs with your phones gps to show you exactly where you are should you need that. Invaluable on the tops in poor weather.
But at the end of the day you got yourself in and out of a medium difficulty NZ hiking trip, and you can take a lot of experience and confidence from that.