There is something about making your own gear that can really hook you in. There's the satisfaction that comes from using stuff that you've made with your own hands, of course. There's also the desire to save a few dollars on the cost of store-bought alternatives - although this is not always the case, particularly if you make too many mistakes, requiring additional materials. For me, I really enjoy the process involved - researching the designs and sourcing the materials, then the preparation phase - layout, markup and cutting - followed by the pinning and sewing and finishing. It is a manual activity, tends to be time-consuming, and is totally engrossing! Some time ago gear-making paragon, Roger Caffin, on seeing one of my rough earlier efforts, made some gently constructive suggestions, then made the remark: "He's lost - got the MYOG bug already!" He was right, of course.
EDIT 20/1/13: After using this MYOG quilt through 2 winters I can report that it is good to around 3-4C (32-39F), when wearing base thermals, socks and a fleece top. In colder conditions and/or on snow I have had trouble staying warm.
This project, a synthetic quilt for cool-weather use, is my third major project. (The most recent prior project was a
MYOG Pyramid Tent.) Up to now I have been using a standard synthetic sleeping bag I bought a few years ago for car-based family camping trips. It has served me well as I have gotten back into hiking over the past year, but it has a few drawbacks - namely, it's big, heavy (2.2kg) and not particularly warm.
Getting the 'big-3' lighter
The weight and volume of gear has become increasingly important to me as I have embraced the lightweight backpacking philosophy and I have gradually transitioned my gear list to reflect a minimalist and multi-use approach. (I will blog on that topic in a later post.) For me, as it is for most 'lightweighters', the key challenges are the big three - shelter, backpack and sleeping system - as they are the heaviest items of gear - and generally the most expensive. I have addressed the shelter issue with the
MYOG Pyramid tent, dropping the shelter weight from around 3.5kg to 830gms. The pack I use, a Osprey Aether 55lt, I only bought a year ago and I am loathe to replace it so soon, particularly as, at around 2kg, it is not super heavy.
Bag vs Quilt
So that brings me back to the sleeping system. The first major decision I had to make was whether to make a bag or a quilt. I had done quite a bit of reading on the topic and there seemed to be a strong case for quilts as the best choice where flexibility and a lighter weight are the key drivers. However, there seems to be a caveat wherein the quilt is primarily for 3 season use. On this last point, I feel that this is probably more applicable to the northern hemisphere, where the hiking can be in areas well below freezing (ie. below -10 degrees C). Here in Australia our conditions are less extreme, tending to be around freezing at the coldest, with single digit variations. So I went with a quilt design with the intention of using my quilt all year round.
Down vs Synthetic
The next big decision was whether to use a synthetic fill or down. This was an easier choice - synthetic is cheaper to buy and easier to work with! The latest synthetic fills are equal to down for insulating capability and perform better than down when damp. On the negative side, synthetic fill does tend to pack larger than down. After weighing the pros and cons, I went with synthetic insulation.
Materials
I ended up buying all the materials from
Thru-hiker in the US.
- For insulation - 5oz Climashield Apex
- For the quilt outer - Momentum 90-MR ('mini-ripstop')
- For the inner liner - Momentum 90-T ('taffeta')
- For edging - 1" grosgrain
[Update: Aussies can also get their materials locally from Simon at www.tiergear.com.au]
My original plan was to have black for the liner and a nice, royal blue-coloured shell. However, Thru-hiker were apparently out of the blue and instead put black MR into the order. I was ambivalent - blue would have been nice and was my preferred colour, but, at least, with all black, the choice of thread was going to be easy and black is about the only polyester thread colour I can actually source locally (in Melbourne).
So anyway, I place the order. Several days later, the box arrived!
 |
| The Thru-hiker order arrives |
 |
| The Climashield burst out of the box |
 |
| Ready to go |
Dimensions
- Neck 46"
- Shoulder 54"
- Hips 46"
- Foot Width 40"
- Length 72'
I later added another 3" to the length, as I found 72" wasn't quite long enough for me (I am 5'11"). I did this by adding a collar to the top of the quilt.
 |
Cutting the Momentum was straightforward.
I used a white sewing pencil to mark up the pattern. |
 |
The pinned up quilt and footbox. I used a flat-sided oval shape for the footbox.
I used a dinner plate to get the curve right at each end. |
 |
| Ready to sew! I followed the Backwoods Daydreamer design for the most part. However, one difference was that I did not cut the insulation to the edge of the liners; instead I made a no-insulation strip around the perimeter. This made the sewing much easier, but meant the insulation moved around a lot. I ended up later on having to sew 3-4" strips around the quilt to hold the insulation in place. |
 |
| Sewing didn't take too long - a couple of evenings for the bulk of it, then another night to make some changes. |
The finished quilt
 |
| The length is just right for me, with head sticking out (plus beanie for the cold weather!) |
 |
| My daughter Zoe demostrates the neck clip and toggle system. |
 |
| Close up of the clip and toggle system for the neck. |
 |
| I use a couple of some sewn in cord loops with a Velcro (hook & loop) strap to hold the quilt in around my middle. |
 |
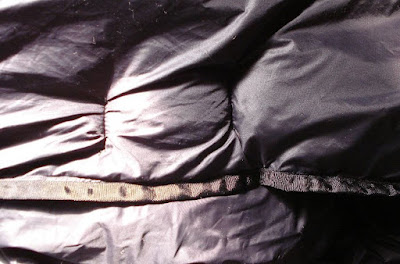
| The grosgrain ribbon provides strenghthening to the edges. |
 |
| An example of the extra stitching needed to hold the insulation in place. |
 |
| Close up of the footbox. |
In the field
I used the quilt in the field for the first time last weekend, when I went snow shoeing to Craig's Hut, near Mt Stirling (
see story here). It wasn't a super cold night - it only got down to 0-1 degree C. I found that I was quite toasty in the quilt, despite wearing less clothes than on a chillier night I spent recently in my older bag. I should point out here that this quilt is meant to be part of a sleeping
system, which in colder conditions should include additional clothing, as required. For the night at Craig's Hut I wore thermal underwear, a fleece top, wool socks and a beanie. For temperatures below say, minus 5, I would expect to also have to wear a down vest and some gloves.
 |
| Field testing |
 |
| Close up of the neck clips |
 |
| The centre tie strap |
The numbers that count.
When squeezed into a stuff bag the quilt can be comfortably gotten down to around 40cm long and 58cm circumference.
The quilt and stuff bag weigh a total of 630gms (22 oz) - that's a huge drop from the 2.2kg I'm used to lugging around!
In terms of cost the original Thru-hiker order cost $125, including $45 delivery to Australia (ouch). By the time I added in thread, a snap connector kit, shock cord, toggle and a bodkin (to thread the neck cord) the total was closer to $140.
And a final word..
I think I am going to really enjoy this quilt - I know Fergie approves - while my hands are tucked away inside, my face is defenceless.


Thanks for sharing. Very useful info! How about your further temperature tests in chillier nights?
ReplyDeleteHi Altair - Thanks for the feedback. Have a look at my Mt Bogong trip blog post - I used it in temperatures down to around -5C on that late winter walk. The quilt worked fine with adequate clothing and inside a Tyvek over bag.
ReplyDeleteHi Andrew. This looks like a fun project. Thanks for posting.
ReplyDelete